In this post, we will show how to set up a fully functional data pipeline that spans from capturing traffic events at the edge using Vercel Edge, to collecting and processing them in Kafka through Upstash, and finally storing them in MongoDB Atlas for real-time querying. The best part about this stack is that all its components are composed of serverless services, which means that you won't have to worry about managing infrastructure or scaling resources.
At the end you should be able to query your traffic on MongoDB.
Let's start with questioning each of these choices:
Why Vercel Edge?
Our approach involves leveraging Vercel Edge Middleware to capture traffic events at the edge. This middleware intercepts user requests and runs our code at the nearest location to the client, allowing us to obtain valuable analytical data such as geo data through the edge API. In addition, using edge middleware decouples web analytics from your application, enabling you to develop your system without modifying the application itself.
Why Kafka?
We could simply push data from Vercel Edge to MongoDB, right? Kafka is a highly available and scalable message queue. Having Kafka between your database and application provides you: Scalability: Kafka acts as a distributed system that can handle large amounts of data. You can adjust the pace to replicate to your database so your database does not become bottleneck.
Fault-tolerance: Kafka provides fault-tolerance through replication of data across multiple brokers. You do not lose the events even your database is unavailable.
Decoupling: Kafka also decouples the application from the database, allowing the two systems to evolve independently and reducing the risk of failure or downtime in one system affecting the other.
Extendability (Real-time processing): Kafka allows real-time processing of data streams. So you can extend the system by building streaming apps which process data from Kafka.
Data transformation: Kafka also provides the ability to transform data as it flows through the system. You can easily transform your data without changing your application.
Why Upstash Kafka?
Setting up and maintaining Kafka yourself can become highly costly. With Upstash Kafka you know nothing about servers, brokers, zookeeper and other stuff. You just use Kafka.
There are also some other managed Kafka alternatives like AWS MSK and Confluent. But Upstash Kafka excels with its pay-per-message pricing and simplicity.
Why MongoDB Atlas?
We have chosen MongoDB because of high scalability. So we can push high amount of data and query them with an acceptable performance. We have chosen Atlas as it is fully managed with serverless pricing model.
Ok, now I hope we feel good about our technology choices, then we can start building:
Architecture

We will use Vercel Edge, Upstash Kafka and Tinybird. Now let’s talk about why we choose each of them.
Kafka Setup
Create an Upstash Kafka cluster, and a topic as explained here. You will use the url and credentials in next steps.
Next.js and Vercel Setup
Vercel Edge middleware intercepts the requests to your web app. We will create a Next.js app and send the events to Kafka using the middleware.
Create a Next.js app:
npx create-next-app@latest --typescriptnpx create-next-app@latest --typescriptCreate a middleware.ts (or .js) file at your pages directory. Update the file:
import { NextResponse } from "next/server";
import type { NextFetchEvent, NextRequest } from "next/server";

import { Kafka } from "@upstash/kafka";

// Trigger this middleware to run on the `/secret-page` route
export const config = {
  matcher: "/",
};

export async function middleware(req: NextRequest, event: NextFetchEvent) {
  const kafka = new Kafka({
    url: "https://handsome-snake-14021-us1-rest-kafka.upstash.io",
    username: "ZGVmaW5453tjlk3gthgQy26tVXO_fm8Y",
    password: "v02ibE2343ll;kpoOybgOHwjmRdNS3nthrt=",
  });

  const message = {
    country: req.geo?.country,
    city: req.geo?.city,
    region: req.geo?.region,
    url: req.url,
    ip: req.headers.get("x-real-ip"),
    mobile: req.headers.get("sec-ch-ua-mobile"),
    platform: req.headers.get("sec-ch-ua-platform"),
    useragent: req.headers.get("user-agent"),
  };

  const p = kafka.producer();
  const topic = "mytopic";

  event.waitUntil(p.produce(topic, JSON.stringify(message)));

  // Rewrite to URL
  return NextResponse.next();
}
import { NextResponse } from "next/server";
import type { NextFetchEvent, NextRequest } from "next/server";
import { Kafka } from "@upstash/kafka";
// Trigger this middleware to run on the `/secret-page` route
export const config = {
matcher: "/",
};
export async function middleware(req: NextRequest, event: NextFetchEvent) {
const kafka = new Kafka({
url: "https://handsome-snake-14021-us1-rest-kafka.upstash.io",
username: "ZGVmaW5453tjlk3gthgQy26tVXO_fm8Y",
password: "v02ibE2343ll;kpoOybgOHwjmRdNS3nthrt=",
});
const message = {
country: req.geo?.country,
city: req.geo?.city,
region: req.geo?.region,
url: req.url,
ip: req.headers.get("x-real-ip"),
mobile: req.headers.get("sec-ch-ua-mobile"),
platform: req.headers.get("sec-ch-ua-platform"),
useragent: req.headers.get("user-agent"),
};
const p = kafka.producer();
const topic = "mytopic";
event.waitUntil(p.produce(topic, JSON.stringify(message)));
// Rewrite to URL
return NextResponse.next();
}Replace url, username, password and the topic name above.
We simply parse the request object and send useful data as an event to Kafka. You can update it depending on your own requirements.
Test the function locally with npm run dev. Deploy your function to Vercel with vercel --prod
The endpoint of the function will be displayed. Check if logs are sent to Kafka by using the following the curl expression:
curl https://handsome-snake-14021-us1-rest-kafka.upstash.io/consume/GROUP_NAME/GROUP_INSTANCE_NAME/mytopic -H "Kafka-Auto-Offset-Reset: earliest" -u \
  REPLACE_HERE
curl https://handsome-snake-14021-us1-rest-kafka.upstash.io/consume/GROUP_NAME/GROUP_INSTANCE_NAME/mytopic -H "Kafka-Auto-Offset-Reset: earliest" -u \
REPLACE_HEREMongoDB Atlas Setup
You can create a serverless MongoDB database in Atlas console. Check this guide for step-by-step instructions (do not create a connector yet). You will need the url and credentials in the next step.
MongoDB Sink Connector Setup
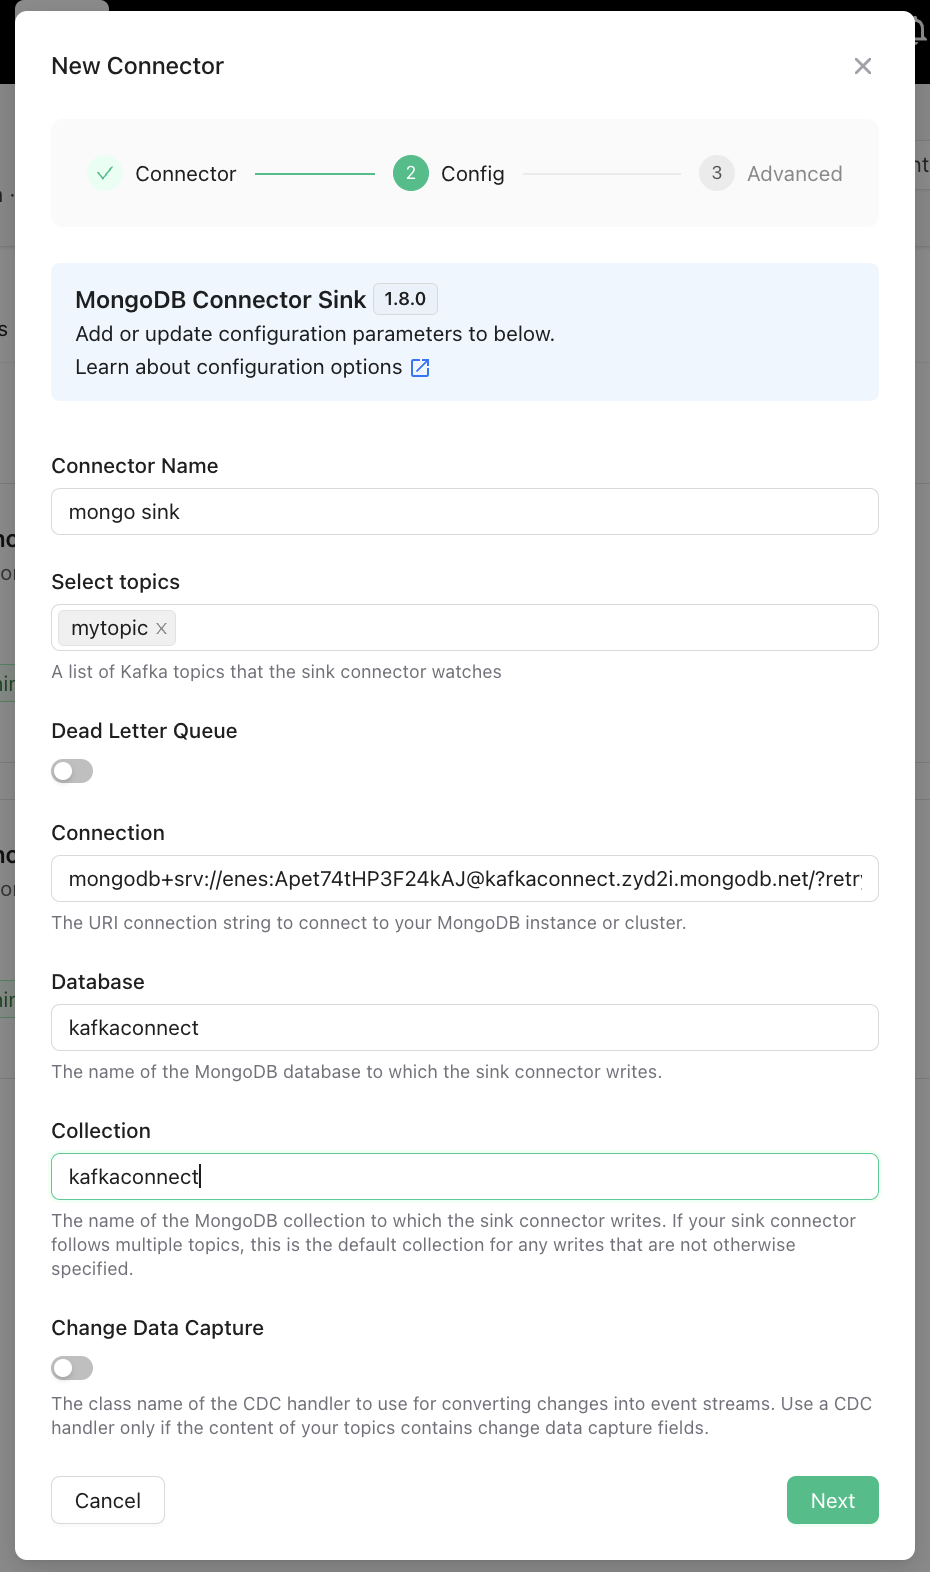
Now we will create MongoDB sink connector. Go to your Upstash Kafka page, click on Connectors tab. Click New Connector, and select MongoDB Sink. In the next screen, enter your MongoDB credentials, database and collection names as below.

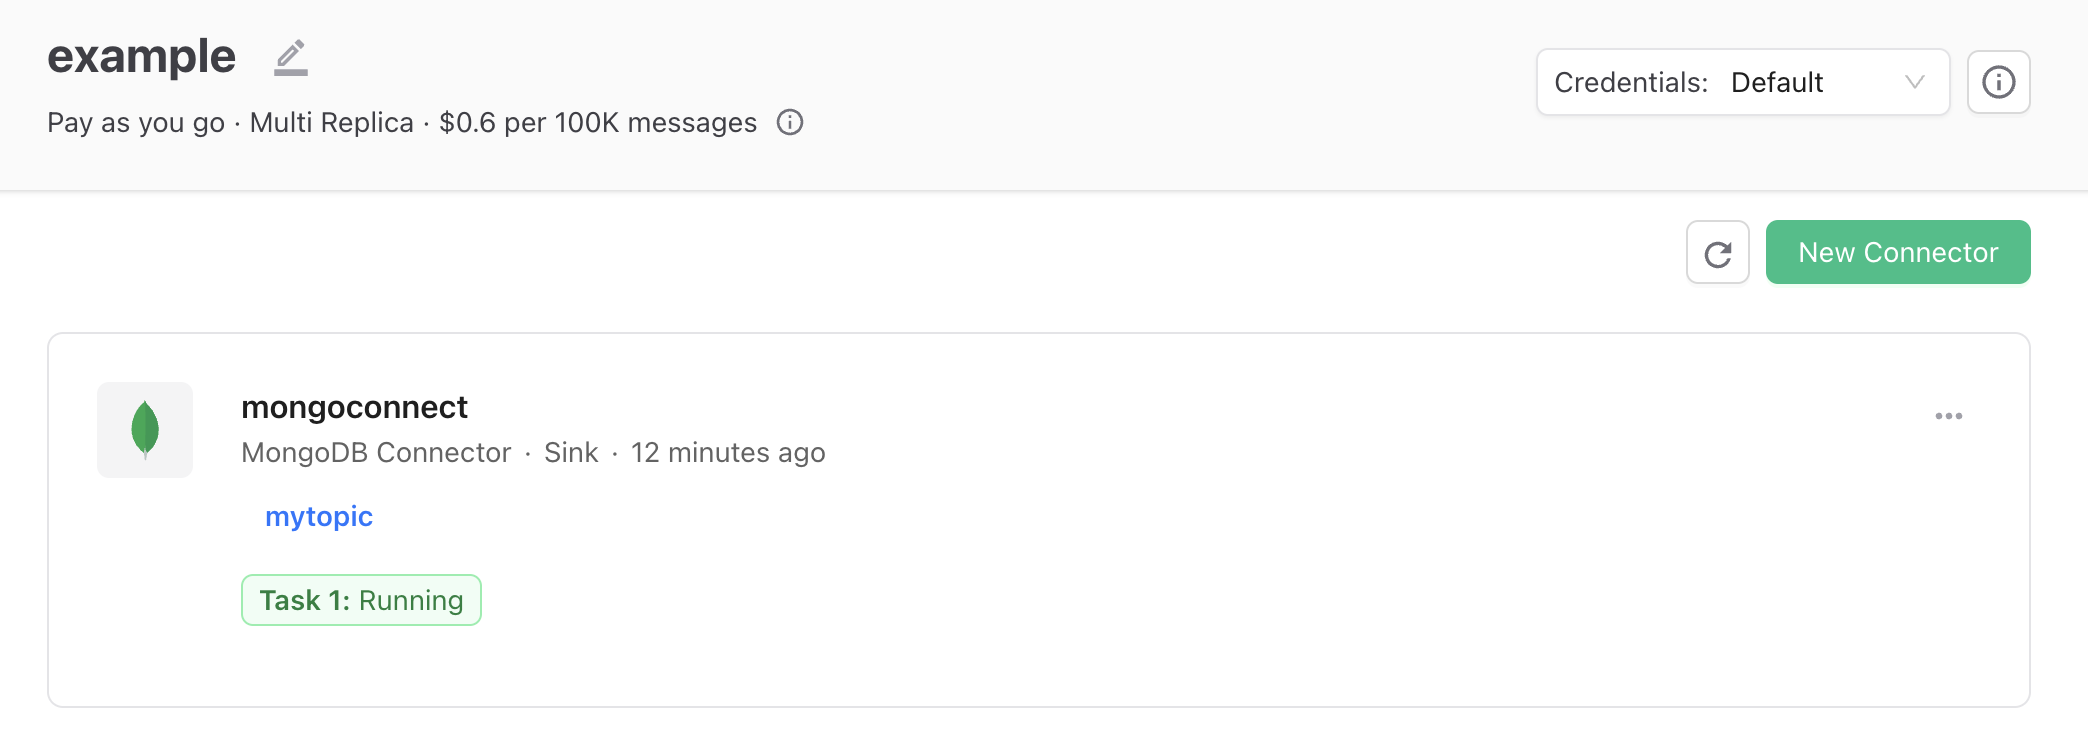
Click on Connect and you should see it is working as below:

Test the pipeline
Now visit your website and open the MongoDB console. You should see the traffic data is being saved to the MongoDB as below:

Conclusion
We have built a simple data pipeline which collect data from edge to Kafka then query real time on MongoDB. Thanks to serverless technologies (Vercel, Upstash, MongoDB Atlas), we achieved this without dealing any server or infrastructural configurations. You can easily extend and adapt this example for much more complex architectures and queries.
